Tuesday, September 27, 2011

Palram HG4008 Multi Line 6 ft. x 8 ft. Greenhouse

We just finished assembling our  Palram HG4008 Multi Line 6ft x 8ft Greenhouse and thought we would share our experience.

We purchased the greenhouse from Menards  last year. Actually I called my parents in Illinois and asked them to buy it for us and we picked it up over the holidays.  It was on sale for $300 which is a good price for a hobby greenhouse.  (I do wish Menards was out west as it is such a better store than the other big box chains - better selection and much lower prices)

The Multi Line greenhouse  description - Strong, bolt-together aluminum frame: Corrosion resistant aluminum frame features strong bolt-together connections that go together quickly and easily. Twin-wall polycarbonate panels: Clear, 4mm UV stabilized twin-wall polycarbonate panels provide excellent heat retention and diffused, even light that your plants will love. Includes galvanized base kit: Heavy-duty galvanized base kit will provide an easy way to anchor your greenhouse to your wood or concrete foundation. Adjustable Ventilation: An adjustable, roof vent and sliding door provide excellent ventilation. Width: 6'-4". Length: 8'-4". Frame spacing: 2'. Height at apex: 6'-8". Glazing: 4mm clear, twin-wall polycarbonate panels. Frame: aluminum with galvanized steel base.

****
The big consideration when purchasing this greenhouse is that the  height is only 6 '5" tall and that is right in the middle of the greenhouse. We decided to put our greenhouse on a wood frame, thus raising it 12 inches.  Of course that creates another problem as now it is a huge step up and over to get into the greenhouse.


I am 5'9" tall and I have to watch my head when entering the greenhouse as the door is not very tall or very wide.  All the pictures online of this greenhouse do not show a person next to the door.  The pictures are just of the greenhouse and some small flowers inside.

The greenhouse has a metal base that is like 6" tall that you have to step over.  With our 12" added to that is an extra big step. We will build steps to get into and out of the greenhouse and are so very happy that we raised the greenhouse up otherwise I would hit my head on the lower parts of the roof.

 Out of the box the side walls including the metal base are 51" tall and the peak height is 77".    We spent part of 2 days assembling the greenhouse.

Since we live on a hill we had to get a load of fill to make some level ground.

 For the added 12" base I used 2x4s attached to landscape timbers.  We used landscape timers for the floor so we could move the greenhouse if we decide on another location.


Here is the base for the greenhouse.  


Held together  with 2 pieces of threaded rod.


I covered the 12" base with heavy plastic.  I can always cover it with wood later one but figure that the plastic will allow the light and head to pass through.  It is 4 layers thick and then I used a roll of clear packing tape on the outside wall and went round and round to cover over the plastic.  Hopefully this will help the plastic last longer.


The hubby was in charge of assembling the greenhouse.  The instructions are 29 pages long and mostly pictures that you have to interpret.   He is more patient than I am.


Rowdy our new kitten was on hand to help out.


and not to be left out, Wiley joined in.


The  greenhouse does not weigh a lot, so we decided to assemble the frame under the carport. 


Lots of time trying to decipher the directions.


On a trip to the shed I saw this small snake next to the steps.  Hope he does not get into my greenhouse.


Almost finished with the frame.  The Hubby did that all on a Saturday. We put some boards on the frame in case of wind and finished assembly the next day.


Sunday morning we picked up the frame and moved it to the final location. It was not very heavy and was very easy  to move. We did tighten the screws to move it and then had to loosen them again to install the panels.


I used our trusty Craftsman professional cordless drill to screw the base of the greenhouse to our frame.  It was mostly level but not as level as we would have liked.  Between the new fill, rain and the old wood we did our best.


The hubby working on the vented roof panel.  We ordered the automatic vent opener for $60.00 as we felt this would be very handy as opposed having to manually open and close the vent.


After reading some reviews and blogs we decided to add a little silicone before installing the panels.  We live in a very high wind area and I worry that the whole greenhouse will blow away.   We had a few problems with the roof panels on one side.  They did not fit into the groove at the bottom of the roof frame.  One problem with using silicone as the panels do not slide as easily as one would like.  I just used extra silicone to fill in any spaces where the panels did not fit as well as they should.

One strange problem was the opening vent panel. You slide it on from the back end of the greenhouse. It slid on easily, but after installing the rest of the roof panels the vent would not close all the way.   We also could not move it and ended up using a hammerwould close better.

The door is a bit wanky.  It does not open and close very easily and some kind of handle would be nice. We used silicone spry to lubricate the track and it works ok for now.  If you are inside and want to close the door, it is very hard to open - as there is nothing to grip. Also the door does not seal very well.  We have a pretty big gap on one side.  We will find a way to seal it better for the winter.

Lastly we used 1/4" aircraft cable to attach the greenhouse frame to the ground. Again my fear is the very high winds, 75mph at times. 

We just ordered some bubble wrap to install on the inside of the greenhouse in an attempt to keep it from freezing inside.  We also filled several 5 gallon pails with water as they will help keep the greenhouse warm on winter nights.


 We made our own self watering planter boxes from Wal-Mart 18 gallon containers.  They sit on top of the water filled 5 gallon pails.


All finished. Now we will see if we can grow over winter in the high desert  All in all for the price it is a good value.  We have a lot to learn about growing in the high desert and are happy not to have a huge amount of money invested in the greenhouse.


Home made Earthbox

How I made my own earthbox self watering planters for my new greenhouse.

We just assembled our 6x8 Multi Line Greenhouse and we were trying to decide what kind of planter boxes we wanted. Our hope is to be able to grow vegetables over the winter. We live in the high desert at about 5000 feet. It freezes at night but gets warm during the day.

I looked into the Earthboxes online and they seem very nice and have good reviews. If money were no object I would have bought 5 or 6 of them.

After doing more research online I decided I could make my own Earthboxes. I purchased 8 - 18 gallon round tubs from Wal-Mart at about $6.00 each.  They come in several colors.


Once I had the tubs chosen I needed to decide how I was going to make the water reservoir.   Several other sites talk about using 2 Rubbermaid tubs. They cut the bottom portion of tub and turn it upside down to make the chamber for the water, that sounds good and I am sure it works.  For me that was too expensive.  Rubbermaid tubs are not cheap and using 2 for each Earthbox would cost too much.

I decided to just use some old plywood to make my chamber and to hold it up with 2" plastic tubing that we had lying around.  

First I  made a template (from the box the greenhouse came in) that was the size the wood would need to be for my chamber. I made the chamber to correspond to the first ring on the tub.  The template was made out of a plastic material and it was easy to cut. Easier than cardboard I found.


Once I was happy with my template I cut one out of the plywood.  I just used old scraps we had around and some we had received from our neighbor as he always checks with me before throwing away any lumber.   As you can see I did not put the hole in the middle right in the middle.  I wanted to leave a little extra room on one side for the watering tube.


I know the wood looks a little beat up but I figure it will last as long as my $6.00 tub.


Several sites mention using pond baskets for the wicking of the water to the soil.  I bought some at Home Depot for about $2.50 each. I then went to the dollar store and found these plastic baskets for a dollar.   I cut out the bottom of the basket and will install them upside down as I feel the top of the basket has more support.


 I used a Dremel to cut out the bottom of the basket. It was easy to cut though the plastic did wrap around the Dremel cutter.


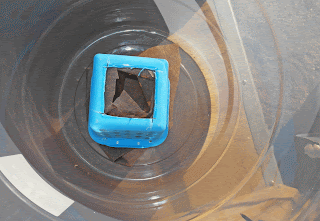
 The basket in the tub before assembly


 This is how it looks in the template. The basket also provides some support to the wood.
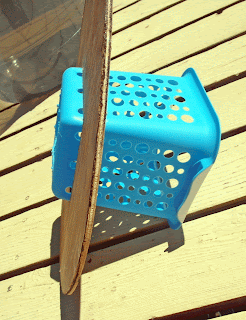
side angle

 Once I got the wood and the basket I needed to cut some holes into the wood to allow water to drain. I also added some holes to the bottom of my blue basket.


Now I needed to make supports to hold my wood up and keep it above the water chamber. I again used my 2" plastic and cut 3 support legs for each tub.  I cut the legs to be 5 1/2" each, or as close as I could get as our small chop saw could not cut the 2" pipe in one try and I had to turn it so not all the cuts are straight, but the bottom of the tub has a ring so nothing will be level anyway.

The water chamber holds 5 gallons of water. 


 My tub filled with all my support legs.


 Here is a close up of the support leg. I also cut some holes into each leg using our small table drill press.  This way the water will not get trapped in the legs. At least I hope the water will not get trapped.


 Before installing each leg I added a few dabs of silicone on the top and bottom to help hold them in place.


 I cut the water tube to be 20" long and made a angle cut with the hacksaw on the bottom to make it easier for the water to drain into the tub.  Here you can see the wood, with water holes and the blue wicking basket all in place.


I added some cheap landscape fabric on top of the wood to  help keep the soil from falling into the water reservoir and to help protect the wood at least a little bit.  I also used landscape fabric inside the blue basket to keep the soil inside the basket. The water should wick up to the main area of the planter box through the blue basket. I filled it up with soil and packed it tightly.


I made 8 - 18QT  tubs for my 6x8 greenhouse.  I used the Miracle Grow Moisture Control Pottting mix in the 64QT bags. 1 bag will almost fill 2 pots.

I left a little room for the 3 planters on my deck. I hope they will over winter in the greenhouse and not freeze.  I am also going to add 1/2" bubble wrap to the inside of the greenhouse to help insulate it.  As you can see I also have 5 gallon tubs filled with water. They raise my tubs and also will provide heat during the night.

Sunday, June 26, 2011

Paddle Cactus

A few shots of the paddle cactus in our yard with lots of flowers in bloom.

this is the most flowers we have seen on this cactus since we moved in


notice the bee inside the center of the flower


Saturday, June 25, 2011

Germany & Belgium May 3-17, 2011 Part 1 Bamberg

So after five years of marriage we finally went on our honeymoon. We saved airlines miles so the flight only cost $300 for both of us. Those United Airlines free tickets sure ain't what they used to be.  Two friends came along for part of the trip. Their son is stationed in Wiesbaden, Germany.  This helped us decide where to fly into, Frankfurt, which is close to Wiesbaden.

We checked the exchange rates before we left and this was the most painful part of the trip, it varied from .65 cents to .70 cents to the dollar.  So if you went to the ATM and took out 300 euro it cost you about 450 US dollars and that is before ATM fees on both sides and the bank exchange fees of 3%. We tried to use our credit card whenever possible, we have one that does not charge to exchange Euro transactions to US dollars.

The flight was actually on Lufthansa on a 747. The plane was old and the seats very uncomfortable. About 3 hours in I though my rear end was going to kill me. I used 2 pillows to help.  No internet or seat tv's only the old school ones every ten feet or so along the aisles. So my husband along the window could not really see the tv. 

(Here we are waiting to board the plane)

We left Chicago O'Hare at 3:30 PM on May 3rd and arrived in Frankfurt on May 4th at 6:50AM.  No one managed much sleep on the flight and since it was already morning we had decided to forgo sleep and start our adventure.  Our friends son, the Marine was waiting for us at the airport.  After a brief wait for our checked bags (Lufthansa allows one free checked bag each)  we headed for the train and our first destination, Bamberg.  We had purchased the Eurail passes back in the states and could use most trains for a certain amount of days.  We tried to pack light for lots of travel, but still found lugging the suitcases on the crowded trains a bit of an ordeal.

(Steve at the airport - a little piece of home)

(The train station in Frankfurt)
(The train station main entrance in Frankfurt)

(Waiting with the luggage while the boys ask which train we should take. We were lucky to travel with mean who were not afraid to ask questions)

(Our ICE train to Bamberg)

 In a few hours we arrived in Bamberg. We choose Bamberg for two reasons.   The first and most important to my husband was smoked beers.  Bamberg is famous for smoked beers and he wanted to try them.  The 2nd reason was that Bamberg was not destroyed in WW2, so they have a very large Old Town section that dates to the middle ages.

So our first stop, luggage in tow, was at  Schlenkerla.  Their specialty is a dark, bottom fermented smoked beer, and tapped from a gravity fed oak wood cask.  For my first lunch I had Schnitzel wiener art with pomme fries - which is breaded fried pork and french fries.  Very good.   I am not much of a drinker so I ordered water.  Our friends son told us that they do not serve tap water and the bottled water tastes weird. He was correct, it tasted bad and it was just plain water. The smoked beer on the other hand was very good and my husband was very happy. 

 (Outside Schlenkerla - since 1405)

(The sixpointed star is the traditional guild sign of the franconian brewers - it is called the beerstar or brewstar)

After lunch we headed to the hotel to get rid of the luggage.  It was a short bus ride out of the main part of town.

  We stayed at the Hotel Buger Hof, which has been owned by the same family since 1898 and is being run by the 4th generation. It also is a beer garden and restaurant.  A very nice, quiet place to stay. The staff was friendly, the room nice and clean and the meals very good.

(Steve in front of the hotel)

(The phone booth - and it still works)

 
(Across the street from the hotel)
 
(Walking towards town from the hotel)

 (At breakfast - what a fantastic room)

We Stopped at the Tourist office and purchased the Bamberg City Card.  It was good for 3 days and gets you into many attractions for free as well as allows you to use the bus. As our hotel was a bus ride out of town, we decided it was a good deal

(Cigarette vending machines)

(The bike paths - watch out and listen for the bells which are your last warning that a biker is coming)

(The old Town Hall of Bamberg, built in 1386 in the middle of the river. Rebuilt in 1744-56)

(Inside the old Town Hall is a museum)

(A staircase inside the old Town hall, it is made from marble or cement, not wood that's for sure)

(A closer look at the design, it is in sections, so it might be cast from a mold or cut from marble)

 
(Statue of St or Queen Kunigunde - the walking tour we took said there used to be several more statues located along the Regnitz River, but they were destroyed by ice flows)
(Cool blue building that the walking tour said something about  but we can't remember.  Kunigunde is in the foreground)
(Queen Kunigunde with the old slaughterhouse in the background across the river)
 
(statues behind the town hall)

(across from the statue above)

(an old crane in town next to the ancient slaughterhouse)

(Little Venice of Bamberg)

(A Chinese restaurant with the Madonna and Child Statue above)

(The Bamberg Cathedral dates back to 1002. It was completed in 1012)

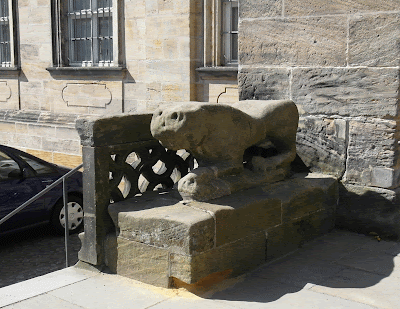
(old lion statue at the entrance to the cathedral)

(A side entrance to the Cathedral)

(notice the statues at the side entrance, people standing on top of other people)

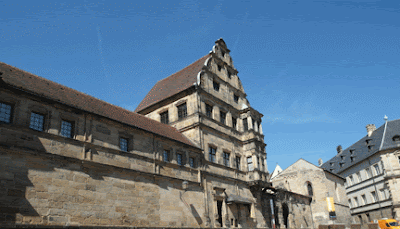
(The Alte Hofhaltung, residence of the bishops in the 16th and 17th centuries)

(The inner courtyard of the Alte Hofhaltung)

(The New Residence of the Bamberg Prince-Bishops was begun in 1613)

(close up of the New Residence)

(the rose garden of the New Residence)

(another angle of the rose garden, you can see the Michaelsberg Abby)
(picture taken from the rose garden of the New Residence and showing Michaelsberg Abby in the distance)

  (shot of Michaelsberg Abby from town)

 (Steve checking out the sites with Michaelsberg behind him)

(The view from the rose garden without the telescope)

  (Michaelsberg Abby - the 1st church  built around 1015 was destroyed by an earthquake around 117. The new church was finished in 1121 and damaged by fire in 1610)

The church is still in use.  They used to brew beer in the Abby in the brew house from 1122 until 1969.  Now it is a museum. This was quite a walk from town as the Abby is located on one of Bamberg's "Seven Hills" - it was well worth the walk.  It is a very large museum with lots of cool old equipment and tolls.


  (Frankisches brauereimuseum Museum entrance sign)

 (Steve checking out the museum. he loves anything to do with beer)


(Steve looks inside the beer barrel)

(inside the beer barrel)

(cool display of making barrels)


 We really enjoyed the beer museum.  if you like walking you can see most of the sites on foot.  Gives you a good workout but then you don't have to feel bad about drinking the beer.


(On our way to get drinks one night we saw this in the hallway of a local bar - The Simpsons are universal)

 (The pumps at a local gas station)

(One of the narrow old streets through town)


 Saturday May 7th,  we head to the Bamberg Train Station (built between 1846-1848) and head to Mittenwald.