Saturday, June 25, 2011

Building an 8x12 shed

Started writing this in January and it is now June - time gets away - 

For our new years first project we have decided to build an 8x12 shed.  In our old house in South Dakota we bought a really nice pre-built shed built by the local Mennonites.  Unfortunately when we moved we had to leave it behind.  So we are going to try and build it ourselves this time.

The shed going to be 8x12 and 10 foot high. 

Materials list (will update as we go along) we built with 2x4's but many people  use  2x6's - we are not putting any heavy equipment like  riding lawn mower in the shed so we think 2x4 will be fine.

  4 - treated 4x4
  2 - treated 2x4x12
12 - treated 2z4x8
  3 - treated 3/4" 4x8 sheets of plywood
42 - 2x4x10  (10 foot  tall wall uses 14 2x4x10's
        2- 2x4x10 for the top plates
 1 - 36" steel door
15 - 4x8 3/8' OSB primed panel siding
 1 - wall vent
26 - 2x4-8 for the roof rafters - we did spaced them at 16" as opposed to 24" -
  2 - 2x4 x8 for the top plate
  1 - 2x6x12 roof ridge beam
many tubes of silicone

Tools

miter saw
circular saw
square
level
snap line
screw gun
hammer
ladder

wood screws -  we use the star bit outdoor screws. You can use nails as well but we prefer the screws and love the star bit ones as they almost never strip out.

First we assembled the floor frame, partially so we would know where to put the blocks for leveling.  It also helps in deciding location of the shed.

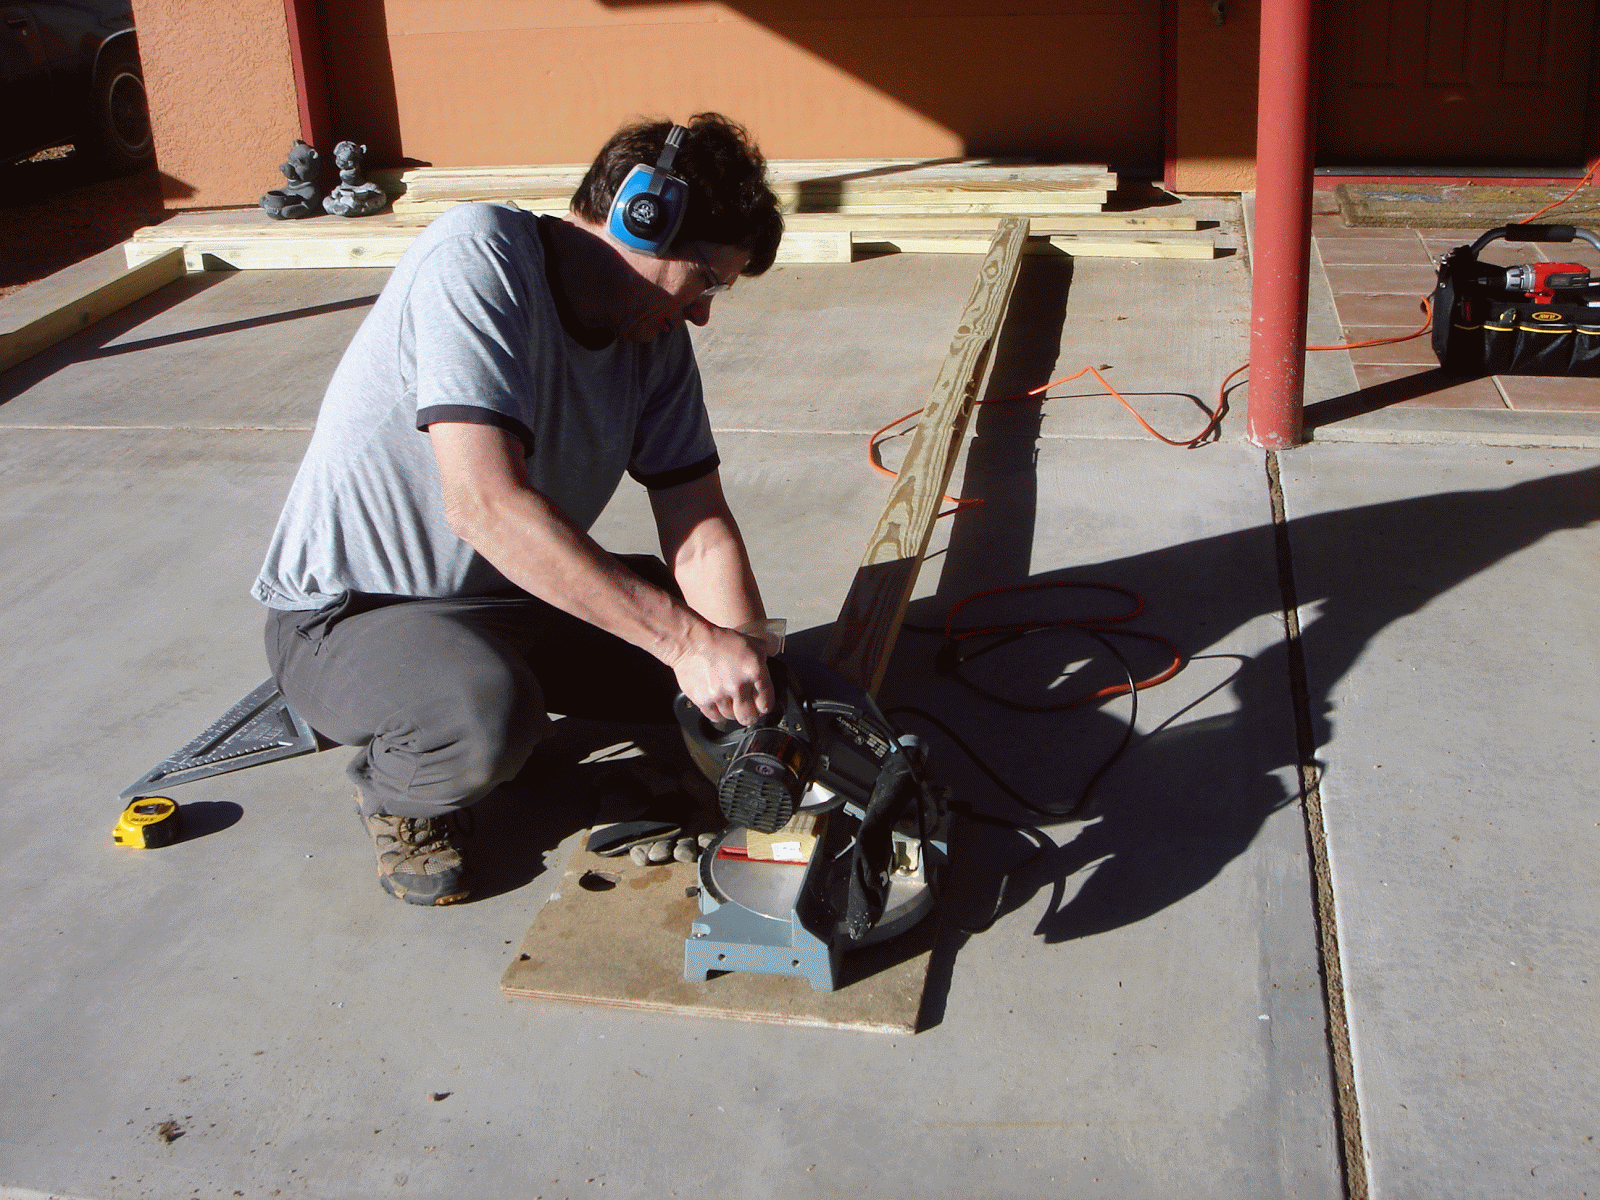
A note on lumber.  It is almost always a bit long, so you should square the ends and make sure it is the exact length you desire.

Always wear hearing protection


We carried around the partial floor frame to pick the perfect location for our shed.


We cut the treated  2x4x12's to exactly 12 foot long.  Then you can lay the boards on edge together and mark the floor joist locations for both boards at the same time.   Then you cut the floor joists to be exactly 8 foot.  You need to minus the width of the 2 - 2x4x12's to get the correct length. We set the 2x4x12's on the ground at 8 foot apart and measured the distance from the inside of the boards.  Cut one treated 2x4x8 and then set it in pace and measure to see if it is correct.  Then use that board as a template to measure the rest of the floor joist boards.  You need 12 for this project. We will use 2 treated  2x4x8's on both ends.

Then we need to level the ground where the shed will live.  That was a lot of work for the hubby as we live on a hill and don't have any ground that is close to level.  


We built our floor frame out of treated 2x4x12's and 2x4x8's - we will be using 4 treated 4x4's under the frame, in case we ever decide to move the shed.

Once we decided on the location of the shed it was time for leveling.  A pick, shovel and a lot of hard work.  You can buy gravel for a base, but we  are cheep and just used the  available soil.  I would suggest using solid cement blocks for leveling the shed. We had the other kind sitting around so we used them.  The one side of the shed needed 3 blocks to be level. We had 3 that were already cemented together. 


the 3 blocks seen here are cemented together and solid

we added supports on the ends and in the middle


 Once we got the blocks level we set the 4 - treated 4x4's on the blocks and then put the floor frame down.  Then we installed the rest of the floor joists.  We used 2 - 3" screws on the end of each board.


you can see the marks we made for board location 16" on center


Then measure from the corner of the frame crosswise to the other corner.  Then do the opposite corners.  They should measure the same length. If not try and adjust to get them the same as this will mean your frame is square.

you can see the 4 - treated 4x4's under the floor frame


 Then we used 3 1/2" screws to attach the frame to the 4x4's.  We also used some 4" screws to attach the fame edges to the 4x4's.  This is where you can have some trouble as it is hard to get 4x4's that length that are straight. Ours had a bit of a curl to them.  We did our best to square everything.

Now it is time for the  treated 3/4" 4x8 sheets of plywood.  Ours weights 110 pounds each.  We used a dolly to move them around.  We did one at a time starting from one end. Lay the sheet down and make sure it fits squarely on your frame. We put a screw in the corners.  Then we ran a chalk line to mark the location for the screws. We put our 2" outdoor screws every foot.

one sheet pf plywood on with one ready.  Marking the board locations

we marked to floor board location on the side boards

after snapping a line - we put in the screws

We had to trim a little off the 3rd sheet of plywood. After we put it on, it was a little long, so we used our battery powered circular saw and cut it even with the end of the frame.

Now it is time to make the walls.  Our will be ten foot high.  We started with the 12' side walls.  We cut 4 - 2x4x12's to exactly 12 foot long.  Then just to be more safe we checked the length to the frame to make sure they were correct. We did this after we cut the first 2x4x12. Then you can use it as a template for the other 3.  Remember to cut a little off one end of each board and then measure for your final length cut.  That way the boards are square.

Then we took 2 - 2x4x12's and set them down on our work space and measured the 10 foot length minus the width of the 2 -2x12's. Grab a 2x4x10 and trim one end.  Then cut it to the measured length and set in down into the frame and measure.  If it is the correct length, then you can cut the rest of the boards using that board as your template.

We took our stack of 2x4x10's and first trimmed all the ends square. Then we cut the other ends to length using our template.  We know we need 28 2x4x10's for the side walls and at last 12 for the ends walls.  


For the 12' side walls we start with 3 -  2x4x10's on each end.  Then from the middle of the inside 3rd 2x4x10 we measured 16" and marked where each board will go. We like to take the top and bottom board and mark the 16" location at the same time on both boards. In fact we did 4 boards for the 2 walls.  That way they will all be exactly the same.

Since our shed is located a bit away from the house, we only partially assembled the wall and then carried it over to the shed location.  If you are building your shed near a power source then you can build the walls right on the floor of the shed.  We set the partially assembled wall on the floor of the shed and then screwed in the rest of the wall boards, again using two 2" outdoor screws in each board end.

Time to add the 4x8 sheets of siding.  We started each sheet about 4" below the wall. I had intended it to cover the treated 2x4 floor frame, but I did not take into account the 3/4" floor, so it is a little short for covering the floor frame. Live and learn.
 
For the first wall we put up, one of the long 12 foot walls, we attached the 4x8 siding before we put up the wall. This is where I went wrong with trying to cover the floor framing 2x4.  Since we attached the siding on the wall before putting the wall up.  Too late - or too much trouble to change.  We braced  the wall with 2 braces, one on each side and used a level and once happy with the level screwed in the braces.

With the wall braces screwed into the floor of the shed, we could not build the remaining walls on the shed floor.  We partially built them on our concrete pad and then carried them over the the shed and put the remaining  boards in. We next attached the 2nd 12' long wall.  We decided not to atatch the 4x8 sheets of siding as it makes the wall heavy.  After leveling and bracing the 2nd wall, we  built the end wall. We measured the space left between the side walls and cut 2 - 2x4x8s to length for the top and bottom wall boards and then added in the 2x10's for the walls.  This was the easiest wall to attach as it was smaller. Again for this wall we did not put the siding on ahead of time.

We framed the front wall in place as we had to account for the door and window and figured we could do that easier on the spot.  We measured the door frame and left a space for that.  We ended up doing the door header wrong, as we put up the 10 foot wall boards and just left the exact space for the door frame.  Again, another learning experience for us.  Since it is only a shed, we added support inside the shed for the door frame as we did not want to take the wall down and start over.

Then we added the top plate, making sure the boards overlapped the seams of the wall boards.  For extra support, we took 2 2x4x8 boards and screwed them across the shed - top plate to top plate.

Then we installed the 4x8 sheets of siding to the other 12' wall and the back wall.  We had to  trim a little off the end pieces but all in all the siding went up pretty easily.  We did add a coat of primer to the ends and any cuts of the siding,. It already comes primed, but we wanted to protect the ends as much as possible as once installed several can't be accessed to be painted.

We did  not side the front as we need to install the door and window first. 


This step is not necessary, but we liked to have plywood on the inside of the shed. In South Dakota I even added insulation.  We used 4x8x 7/16 osb plywood.  I installed the sheets the tall way on the insulate of the shed walls, except for the front wall which is not finished. Then I cut pieces to fill in the remaining 2 feet to cover the full ten foot walls. Then, since we will be using the shed for storage, at 7' we added a row of 2x4's to create a frame for the attic floor. I then used  2x4x8's to support the floor of the attic.  I am creating two attic spaces at both ends of the shed with an open sot in the middle of the shed for access.  Each side will be 4' wide and a little less than 8' long as one looses the width of the walls.  It should give us lots of space for storage and a nice platform for installing the roof.

I screwed up here again. for the attic floor on the front side of the shed, I did not put in the final board as the door needed to be installed first. I installed the door (this was when I realized we did the header board wrong)  and the I also realized the attic floor needed to move up at least an inch to allow the door to open.  So much to consider. I decided to move the attic  floor on the front side of the shed up 4" so it will not be a problem.  The other attic floor in the back of the shed I left at 7'.


Materials list for the attic floor –

2 sheets 4x8x 7/16” plywood
11- 2x4x8    6 along the walls, 4  floor joists – I spaced the floor joists at 2’
             1 – cut and screwed between the floor joists for more support – 2 supports for each joist


We installed the plywood on the roof as well before installing the metal.  We had our house roof replaced the previous fall and used some of the leftover pieces on the shed.  I had to paint some of the metal roof to match as they had used some green metal roofing to protect the red in transport. I used automotive paint on the green metal.


My husband just picked a height for the roof (not very scientific I know) and we then made the trusses to fit that.  We used a 2x6 and cut the 2x4's to attach to it from both sides.  It was very steep, especially when you ahd to be on the roof as I was to attach the top cap and roofing sheets.  We were somewhat limited as to having an overhand as we only had some much roof material and did not want to buy any.  He made a template for the side supports and then cut the rest to match. We did ours 16" on center as we have high winds and want lots of support.  WE do not have much rain so we are not as worried about leaks.


 We installed the plywood in sections so we could access the roof from my attic space inside. It made it easier and safer.  I am a big fan of silicone. When in doubt I use it.  It is supposed to last for years and is an extra safety precaution for not a lot of money. 


With the roof on and the door and window installed it is time to paint. On the corners we used hardiboard trim.  Should last forever and it looks great.  Along the back wall of the shed we added a vent.


It looks pretty nice and has lots of storage.  I have since sealed up the bottom with aluminum and wire to try and keep pack rats from nesting.   I also added a ramp to the front door.  Makes it easy to get the garden cart in and out.


We finished the shed in February and I made the ramp in March.  Still getting the inside organized.

Friday, October 15, 2010

Invasion of the Wasps

So what if it this fall. We have been inundated with wasps. They swarm all around the house and yard. It does not feel safe to enjoy the nice fall weather. The wasps are in the landscape blocks looking for hoes to get inside and build nests. I used mortar mix in the tube and tried to seal up as many of the holes as I can find. The wasps are determined and manage to reopen some of the holes.

S.S. was stung twice last month as he inadvertently went too close to a wasp next in some cement blocks. I have been lucky and they have not stung me, yet. I try and do my hole sealing in the morning before the sun hits the hole. The wasps are sleepy and not active.

I am not talking about a few wasps, we have hundreds that buzz around the house all day looking for holes I guess. I even had to use silicone between some deck boards as they seemed to have built a nest somewhere between the boards. Probably in the dry rotten wood.  I will say that the wasp spray works great and from far away.

I have just finished painting the exterior of our house and I had to really think about how and when to paint to try and cut down the the wasp issue.   Early morning was best as they are not active yet. Boy when the sun hits where they are, they just start their buzzing all around. Nothing like being up on a ladder, holding your paint try and trying to dodge a wasp.

S.S. thought it was funny the way I painted. Of course he is afraid of heights.  The other side of the house is even taller as the previous owner dug for a new basement but never finished it, so we just have a big hole and a living room door with one big step to the ground.
.


S.S.  took this picture and wrote a funny caption...

Is your ladder TOO SHORT for those hard-to-reach paint jobs? Don’t stand on that unsafe top step! But don’t spend $$$$ on a bigger ladder! Get the new Laddr-Xtender! Yes, Laddr-Xtender increases ANY ladders height nearly three full feet.

Stable, safe and secure! Less than one fifth the cost of a clumsy, hard-to-store bigger ladder. Get one today! (OSHA approval pending.) (Auxiliary ladder for climbing up to Xtender-ed ladder not included.)


You have to admit he's a good writer.


Oh, but I digress from the wasps.


One problem I know is that the previous owner set up an automatic water system for the birds and animals.  It too is surrounded by wasps all day all summer. I feel bad for the birds and animals like the bunnies, though they do not seem to have been stung.  Still not fun to have to worry about that while trying to get some water.  Have not figured out a way to discourage the wasps from the water and I hate to take it away from all the critters.

The bobcat does not come by very often and if you are not looking outside at the right moment you will miss his visit.


With the good comes the bad I guess.

So tonight the hubby was out  putting the glass bottles in the back of the vehicle to take to the recycling center - the plastic garbage can had split and as he moved a bag to remove it - you guessed it wasps attacked - they were making a nest inside the can - as he flailed his hands to protect himself (you remember he was stung twice last month) his wedding ring flew off.  He could not find it - but like a good wife I found it -  he was very relieved - I was happy he was not stung.

Wednesday, October 13, 2010

S.S. Wilson - LA Book Signing - Saturday Oct 16th

S.S.  Wilson will be doing a book signing for his action adventure novel Tucker's Monster on Saturday October 16th at 2:00 PM.  Stop by and say hi.

In his first novel, veteran screenwriter S. S. Wilson (Tremors, Short Circuit, The Wild Wild West) offers up a rollicking adventure in which wide-eyed Whitney learns about werewolves, mummies, ghosts, and  even meets a mad scientist. On a more subtle level, Wilson also pokes ample fun at classic horror movie clichés as he careens toward an unexpected (and Hollywood sized) climax.


The store is:   BOOKFELLOWS / MYSTERY AND IMAGINATION

The book store is located at 236 N Brand Blvd. in Glendale, CA.   91203  (818) 545-0206
www.mysteryandimagination.com/


S.S. Wilson Takes His Novel Tucker’s Monster to a Halloween Party at Poisoned Pen Book Store in Scottsdale, AZ

S.S. Wilson (known for the such popular movies as Short Circuit, Tremors and The Wild Wild West) joins a ghoulish gallery of noted fantasy authors signing their works at The Poisoned Pen book store in Scottsdale, AZ. The authors are James A Owen (The Dragon's Apprentice), Weston Ochse (Empire of Salt & Scarecrow Gods) , Sam Sykes (Tome of the Undergates) and Larry Corriea (Monster Hunter: Vendetta). Wilson will be signing his new action adventure novel, Tucker’s Monster.

The store, specializing in mysteries and thrillers, will host its “Halloween Party” event Sunday October 24th from 2 to 4 PM at its location on 4014 N Goldwater Blvd. Suite 101 Scottsdale, AZ 85251. For more information call the The Poisoned Pen book store at (480) 947-2974 or visit their website: www.poisonedpen.com.


The Poisoned Pen
4014 N Goldwater Blvd. Suite 101
Scottsdale, AZ 85251
(480) 947-2974

http://www.poisonedpen.com

If you can not make the book signings and want a copy of the book it can easily be ordered from Amazon or Barnes & Noble. Autographed copies and copies signed and personalized by the author are available from arealdealproductions

The site also sells autographed 8x10 photos from Tremors and Short Circuit. 


S.S. is currently working on his 2nd novel Fraiday Cats. I have read the book and it is a lot of fun. Another period piece. This one seeks to tell the real story of what really happened in Dr. Frankenstein’s lab.  Another page turner from a master writer. 

Thursday, October 7, 2010

Tremors Blu-ray release date November 9, 2010

Some Tremors news today.  Universal has finally gotten around to putting Tremors on Bu-ray. It is set to be released on November 9th.  So far I have found no news on the release dates of the other Tremors films, but hopefully they are in the pipeline.


According to Amazon the extra features include a making-of documentary, a video showing the creation of the worm-creatures, outtakes from the film, the original ending not shown in theaters, original theatrical trailers, and  production photographs.

Hope the Blu-ray and extras are worth the price of admission.  Amazon lists the film for $24.49 which is .51 cents under the free shipping offered when you spend 25 bucks.


Here is a link to a youtube video S.S. Wilson made describing how he got the idea for Tremors years before he wrote the script with his writing partner Brent Maddock.


http://www.youtube.com/watch?v=PyYH2WUDx1w

S.S. Wilson also has a facebook page: facebook.com/SSWilson.movieguy

Wednesday, October 6, 2010

Why did the Bears have to loose when I finally got to watch the game?

So of course this past Sunday night I finally got to see the Chicago Bears game. 

We have lived for several years without any tv, only dvd's and netflix, then my folks came to visit and they needed  tv so we bought an antenna.  Luckily for us it is only 60 miles to the nearest tv station. 

The Spanish station comes in the best and is in HD.  Go figure.  NBC has the best reception of the network stations.  (I won't go into all the religious stations & infomercial stations) The antenna is outside on a pole and has a remote that will move it from side to side up to 90 degrees.  It helped some with the tuning but would be a pain to have to do that all the time. Luckily I don't watch much tv, so not a big deal.

As a lifelong Chicago Bears fan, I decided to take advantage of our new antenna and watch the game.  I only made it to half time as I knew it was going bad and was too depressing to watch. After 3 weeks of split second, game ending wins, I was hoping for some good action. 

Oh, well.   I feel Like Bing Crosby, who left the country during the 1960 World Series and had his people film the game off the tv.  He knew if he watched it would be bad luck. Of course that ended up being great luck for his team and for fans now that that film has been found.

I was sure expecting some offense from the Bears, especially after all the glowing stories of the new  offensive coordinator Mike Martz. Didn't see any of that on Sunday night against the Giants. Of course Jay spent most of the first half on his butt.   Well any team can have a bad week. 

Funny how many new names are on the team.  Walter Payton will always be my favorite player - he had class and was a great player.

This brings me to the point of the blog, a picture from the past  - when I worked on the Jamie Kennedy Experiment, Season 3.  We filmed in New York and did a segment with Tiki Barber and Amani Toomer. 


Of course I had to wear my Bears shirt that day. One must always show their true colors.


They were great guys and it was fun nice to meet them.  Later on in the season on the Jamie Kennedy Experiment we filmed in Chicago and had Da Coach on.  That will be another post.

Tucker's Monster - a new action adventure novel by S.S. Wilson


Real Deal Productions is proud to announce that S. S. Wilson’s novel, Tucker’s Monster, won the prestigious Bill Fisher Award for Best First Book - Fiction, presented at the 2011 Benjamin Franklin Awards, May 23 in New York.


The best action adventure novel I have read this year (of course it may be the only one as well).

Finished reading this book a few months ago.  It is a fun fast read. S.S. Wilson is a screenwriter. He has written such films  as Tremors and Short Circuit.  He also wrote Ghost Dad but I have never seen that film.  I have also never seen the film Heart and Souls either which stars Robert Downey,Jr.

This is his first novel. It is a period piece that takes place in the early 1900's.  It follows a cattle rancher who searches the world trying to find a living dinosaur.  It has lots of the fun elements that I enjoyed in the Tremors movies.  The book is a page turner that makes it hard to put down.  It goes from one adventure to the next and he really captures the time period with lots of details.

The book follows Harold B Tucker, kinda a Burt Gummer type(if you know Tremors and If you don't what is wrong with you) at least as far as guns go.  He's a man who knows what he wants and isn't afraid to go after it.  Of course his obsession in trying to find a living dinosaur leads him to make some questionable decisions, but then flawed characters are the most interesting.

I'll stop there.  No spoilers!

If you are looking for a fun, fiction book I recommend Tucker's Monster.


I should put in the disclaimer that I know S.S. Wilson. We met on the set of Tremors 4. He is a great guy, who I ended up marrying.  Well he has been a great guy so far. 

Oh, and if you want to be considered arealdeal,you must have been born a "Deal"